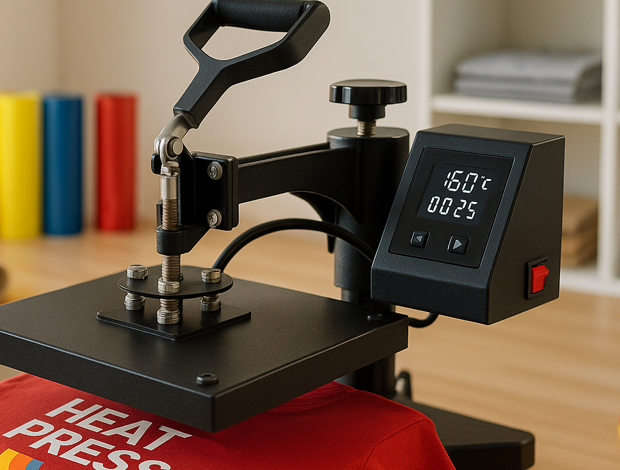
Heat pressing success boils down to three key factors: time, temperature, and pressure. Here’s a quick breakdown to get it right every time:
- Temperature: Activates adhesives and dyes. Ranges from 280°F to 385°F based on material.
- Time: Determines heat application duration. Typically 10–60 seconds.
- Pressure: Ensures adhesion and color transfer. Measured in PSI (pounds per square inch).
Quick Tips for Common Materials:
- 100% Cotton: 350°F, 40 PSI, 15 seconds.
- Polyester: 305°F, 30 PSI, 10–12 seconds.
- Poly-Cotton Blends: 340°F, 35 PSI, 12–15 seconds.
- Ceramics (Mugs): 385°F, firm pressure, 180 seconds.
- Caps/Hats: 320°F, 30 PSI, 25–30 seconds.
Avoid common issues like scorching, peeling, or uneven transfers by testing settings on sample materials and calibrating your machine regularly. For layered designs, always use the lowest recommended temperature to protect all materials.
Key Takeaway: Fine-tune time, temp, and pressure for each material to ensure professional-quality results every time.
Settings by Material Type
Material Settings Guide
Different materials need specific heat press settings for the best results. Here are the standard settings for some common materials:
- Cotton (100%): Set the heat to 350°F with 40-50 PSI pressure for 15 seconds. Pre-press for 3-5 seconds to remove moisture. For layered designs, press for 20 seconds to ensure everything adheres properly.
- Polyester: Use 305°F with 30-40 PSI pressure for 10-12 seconds. Pre-press for 5 seconds to manage dye migration effectively.
- Poly-Cotton Blends: Set the temperature to 340°F with 35-45 PSI pressure for 12-15 seconds. These settings help avoid scorching the polyester while ensuring adhesion to cotton. Always test on a sample piece first.
- Ceramics (Mugs): Apply 385°F with firm pressure for 180 seconds. Use the correct mug press attachment for even pressure. Let the item cool for 60 seconds before removing it.
- Caps and Hats: Heat to 320°F with 30-35 PSI pressure for 25-30 seconds. Pre-press for 10 seconds to eliminate moisture and wrinkles.
Quick Reference Settings Table
| Material Type | Temperature | Pressure (PSI) | Time (seconds) | Special Instructions |
|---|---|---|---|---|
| Cotton (100%) | 350°F | 40-50 | 15 | Pre-press 3-5 seconds |
| Polyester | 305°F | 30-40 | 10-12 | Pre-press 5 seconds |
| Poly-Cotton Blends | 340°F | 35-45 | 12-15 | Test on a sample piece |
| Ceramic (Mugs) | 385°F | Firm | 180 | Cool for 60 seconds |
| Caps and Hats | 320°F | 30-35 | 25-30 | Use cap press attachment |
For projects with layered designs or multiple materials, always use the lowest temperature recommended for any material in the design. This avoids damage and ensures proper adhesion across all layers. Keep an eye on the first few items and adjust the settings if needed. These guidelines are a starting point – fine-tune them based on your equipment and specific materials.
Factors Affecting Print Quality
Equipment and Material Variables
The performance of heat press machines can vary due to several factors, even among identical models. Here are some key variables to consider:
- Temperature Differences: The temperature displayed on a heat press might not match the actual surface temperature. Professional-grade machines tend to maintain more consistent and accurate heat levels.
- Pressure Application: Pressure distribution depends on the size and flatness of the platen. When working with larger items, you might need to adjust settings to ensure even pressure across the entire design.
- Material Thickness: Thicker materials generally require longer pressing times compared to thinner ones to achieve proper results.
Along with these equipment-related factors, external conditions also play a role in print quality.
External Conditions
Environmental factors like humidity and room temperature can significantly impact the outcome of your prints. For instance:
- Humidity Levels: High humidity can introduce extra moisture into the material, which may interfere with adhesion. On the other hand, low humidity can cause static buildup, leading to print inconsistencies.
- Ambient Temperature: The surrounding temperature affects heat transfer. In cooler environments, you might need to tweak your press settings slightly to ensure proper heat application compared to warmer conditions.
Testing and Calibration Steps
To minimize the impact of equipment and environmental variables, follow these calibration steps:
1. Temperature Verification
- Use an infrared thermometer to measure the platen’s actual temperature.
- Once the machine has fully warmed up, check for consistent temperatures across the platen surface.
2. Pressure Testing
- Assess the evenness of pressure across the platen.
- Test pressure settings with different material types and document the results.
- Adjust pressure incrementally to achieve uniform application.
3. Production Testing
- Conduct test prints on scrap materials similar to your production items.
- Evaluate the print’s adhesion and durability after curing and washing.
- Record the best-performing settings for future use.
Problem-Solving and Tips
Common Issues and Fixes
Heat pressing can sometimes lead to challenges. Here’s how to tackle some of the most frequent problems:
Scorching or Discoloration
- Lower the temperature slightly and reduce pressing time while maintaining steady pressure.
- Place a protective sheet between the heat platen and the material.
- Use an infrared thermometer to monitor the platen temperature for better accuracy.
Incomplete Transfers
- Make sure the heat press reaches the recommended temperature.
- Gradually increase the pressure until the transfer sticks properly.
- Extend the pressing time slightly if needed.
- Always use dry materials when pressing.
If the issue continues, double-check your adhesion settings.
Adhesion Problems
- Pre-press the materials to eliminate moisture.
- Clean the platen surface to prevent residue buildup that could interfere with adhesion.
- Ensure the pressure is evenly distributed across the design.
- Let transfers cool completely before peeling.
Addressing these common problems will set the stage for smoother production. Next, focus on quality control to maintain high standards.
Quality Control Methods
Once you’ve resolved pressing issues, quality control becomes essential to ensure consistent results.
Pre-Press Inspection
- Look for defects or moisture in the materials.
- Confirm correct design placement and size.
- Test the pressure distribution across the platen.
- Clean both the upper and lower platens.
During Production
- Use an infrared thermometer to keep an eye on the temperature.
- Ensure consistent pressure for every print.
- Check the transfer quality immediately after peeling.
- Keep a record of optimal settings for future use.
Post-Production Testing
- Conduct wash tests on sample prints.
- Verify color consistency across different batches.
- Test the durability of the designs.
- Note any adjustments needed for future improvement.
A well-structured quality control process not only ensures professional results but also minimizes waste. With these troubleshooting tips and quality checks, you’ll consistently achieve high-quality heat press outcomes.https://app.seobotai.com/banner/inline/?id=sbb-itb-bd3491f
Heat Press Temperature Guide: Sublimation and HTV
Scalable Press Heat Press Services
Scalable Press applies the ideal time, temperature, and pressure settings to deliver top-tier results with heat press technology.
Materials and Printing Methods
Scalable Press offers heat press services for a wide range of materials and printing methods. With over 50 material options available, we handle everything from cotton garments to unique items like ceramic mugs and metal plates.
Our heat press methods include:
Screen Printing
- Best for bulk orders with uniform quality
- Supports up to six-color designs with PANTONE® matching
Direct-to-Garment (DTG)
- Ideal for intricate, photorealistic designs
- Customized settings for different fabric types
Sublimation Printing
- Produces bold, full-color prints on polyester items
- Uses 400°F heat, 500+ PSI, for 45 seconds
For 50/50 cotton-polyester blends, a split heat profile is applied: 320°F for 30 seconds at medium pressure, followed by a 10-second cooling phase. This method cut material waste by 18% during 2024 production runs.
These precise settings ensure consistent quality across all heat press operations.
Production and Delivery Process
Scalable Press combines advanced technology and strategically located facilities to streamline production and delivery. With 12 global fulfillment centers, we maintain high standards while reducing delivery times.
Quality Control Highlights:
- Laser-guided alignment for precise results
- 99.4% defect-free rate across 2.3 million items in 2024
For large orders, our distributed production model enables simultaneous processing across multiple locations. In 2024, we fulfilled an order of 10,000 sublimated sportswear items in just 72 hours by utilizing three U.S. facilities.
Delivery Options:
- Same-day shipping for orders placed before 12 PM PT
- Standard ground shipping: 3–5 business days
- Expedited 2-day air available
- 94% on-time delivery rate for orders of 5,000+ units
Our automated system integrates with platforms like Shopify and WooCommerce, offering real-time tracking and updates for every order.
Summary
Get the best results from your heat press by mastering the balance of time, temperature, and pressure. These three factors work together to determine the quality and durability of your prints, and each material may need its own specific setup.
Key Tips for Success:
- Follow manufacturer guidelines for recommended temperature and pressure settings.
- Start low and adjust gradually until you reach the desired outcome.
- Document successful settings for future reference.
- Test and calibrate regularly to ensure accurate temperature and even pressure.
Even small changes in these factors can affect your final results. Take a systematic approach to fine-tune and verify your settings for consistent, high-quality prints.
FAQs
How do I ensure consistent pressure when heat pressing larger items?
To achieve even pressure distribution when using a heat press on larger items, start by ensuring your heat press is properly calibrated. Uneven pressure often results from misaligned plates or an improperly adjusted pressure knob.
When pressing larger items, use a foam pad or pressing pillow under the material to compensate for uneven surfaces, such as seams or zippers. This helps distribute pressure more evenly across the entire design area. Additionally, double-check that the item is lying flat and wrinkle-free before pressing.
Finally, test on a scrap piece or corner of the fabric to confirm even pressure before completing the full press. Taking these steps will help you achieve high-quality, professional results every time.×
How can I prevent dye migration when heat pressing polyester fabrics?
Dye migration occurs when the dye from polyester fabrics bleeds into the applied design during heat pressing, causing discoloration. To prevent this, use low-temperature heat transfer materials specifically designed for polyester. Set your heat press to a lower temperature (typically between 280°F and 300°F) and reduce the pressing time to minimize heat exposure.
Additionally, always test a small area first and consider using a heat press pillow to evenly distribute pressure. This can help ensure the best results while protecting the integrity of the fabric and design.×
How do humidity and room temperature impact the heat press process, and what can I do to address these issues?
Humidity and room temperature can influence the heat press process by affecting how materials react to heat, pressure, and time. For example, high humidity can cause moisture buildup on materials, potentially leading to uneven transfers or poor adhesion. Similarly, extreme ambient temperatures may alter the performance of heat-sensitive materials.
To mitigate these effects, work in a climate-controlled environment where humidity levels are kept between 40-60% and the room temperature is stable, ideally around 70-75°F. Always store your materials in a dry, cool place and preheat your garments or items briefly with the heat press to remove any excess moisture before applying your design.
Leave a Reply